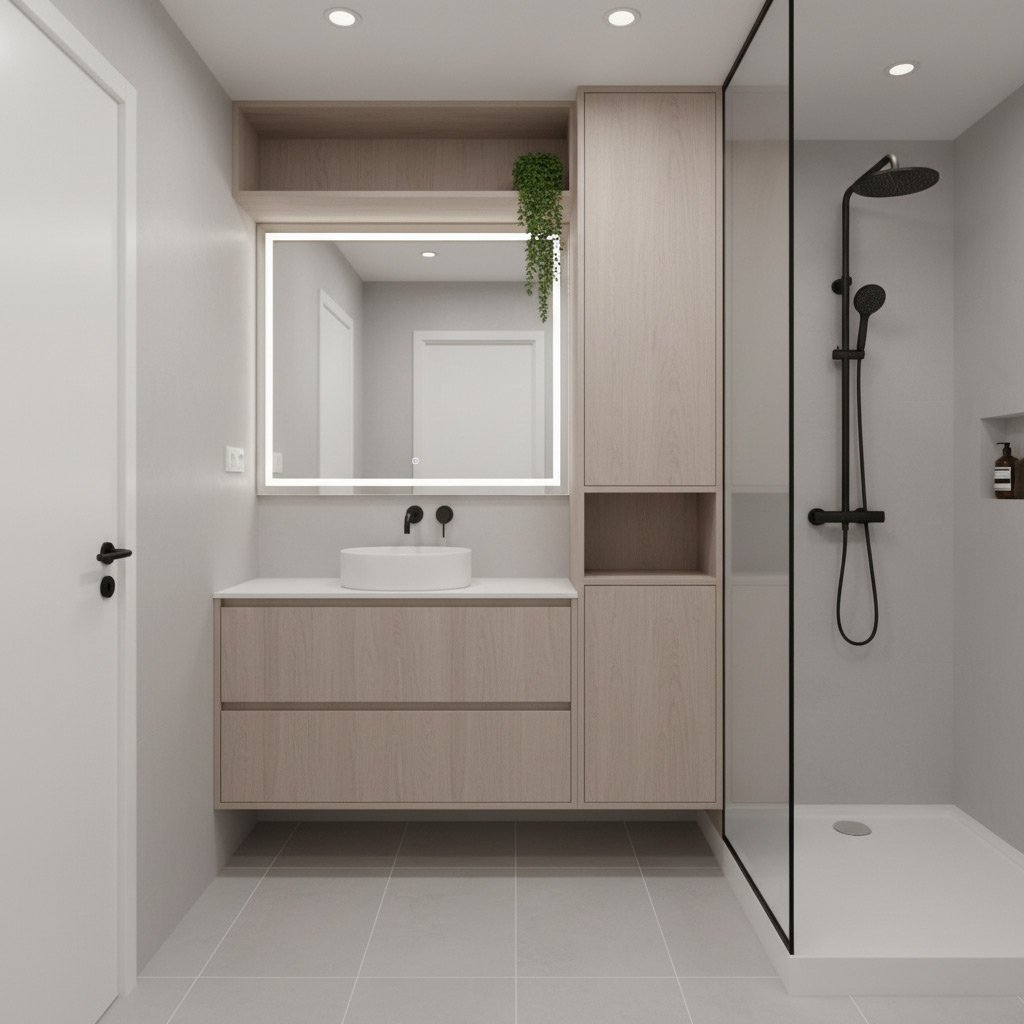
Picture this: you open the bathroom door and the first thing you see is a sleek, seamless wall that feels like it was pulled straight from a high‑end showroom, not a typical Arizona home.
Acrylic panels are the secret weapon for Goodyear homeowners who want durability without the cold, hard look of tile, and they handle our desert heat like a champ.
Most DIYers stumble over the same three pitfalls—poor surface prep, mismatched seams, and the wrong adhesive—so we’ve mapped out a step‑by‑step plan that keeps you on the fast track to a flawless finish.
Ready to skip the guesswork and see exactly how the pros pull off a perfect acrylic bath wall? Keep reading and we’ll walk you through every move.
Assessing Your Bathroom: Measuring, Planning, and Choosing the Right Acrylic Panels
Step 1 – Get the Numbers Right
Grab a steel tape, a level, and a notepad. Measure the width, height, and depth of the tub surround, then double‑check each figure; a half‑inch error shows up as a gap you’ll hate later.
- Width: from one side wall to the other, including any niche.
- Height: from the tub lip to the ceiling or the point where you’ll stop the panel.
- Depth: the distance from the back wall to the front edge of the tub.
Tip: Write the numbers in inches, then convert to centimeters if your supplier lists panel sizes that way.
Step 2 – Sketch a Simple Layout
Before you order anything, draw a quick top‑down diagram. Mark doors, windows, and any plumbing that sticks out. This visual helps you spot trouble spots before the first cut.
- Identify where the panel will meet the vanity or shower door.
- Plan for a small expansion gap (about 1/8") at the corners to allow for movement.
- Note any recessed shelves or grab bars that need cut‑outs.
Keep the sketch on your phone; you’ll reference it when you’re on the ladder.
Step 3 – Pick Panels That Fit Your Lifestyle
Not all acrylic is created equal. Look for panels with a UV‑resistant coating; Goodyear’s desert sun can yellow cheap sheets in a few years.
- Thickness: 3 mm for most residential walls, 4 mm if you expect heavy use.
- Finish: matte for a softer look, high‑gloss if you want that showroom shine.
- Color stability: choose a brand that guarantees color retention for at least 10 years.
When you match the panel’s specs to your measurement and layout, the rest of the job falls into place like a well‑cut puzzle.
Surface Preparation: Cleaning, Priming, and Moisture Management for Goeyear Homes
Before the first acrylic panel ever touches the wall, the surface has to be spotless and stable. In Goodyear’s dry heat, dust and leftover grout act like a magnet for future cracks, so a thorough clean‑up is non‑negotiable.
Cleaning the Substrate
- Remove all old tile, caulk, and adhesive with a scraper or rotary tool.
- Vacuum the area, then wipe it down with a trisodium phosphate (TSP) solution to dissolve grease.
- Rinse with clean water and let it dry completely—no shortcuts.
Once the wall is clean, a proper primer creates the chemical bridge that acrylic loves. Choose a primer labeled “high‑adhesion” and compatible with both drywall and cement backer board.
Priming for Adhesion
- Apply a thin, even coat using a roller; avoid puddles.
- Let the primer cure for the manufacturer‑recommended time—usually 30‑45 minutes in desert conditions.
- Inspect for missed spots; a quick touch‑up now saves a costly redo later.
Moisture is the silent enemy, even in a desert. A hidden leak or high humidity can cause acrylic to delaminate, so you need to lock out water before you start.
Moisture Management
- Run a moisture meter; any reading above 5% means you need a waterproofing membrane.
- Install a liquid‑applied barrier or sheet membrane over the primed surface.
- Seal all seams with a silicone‑based sealant that tolerates temperature swings.

Selecting the Perfect Adhesive and Sealant: Compatibility with Desert Climate Conditions
Why the Right Glue Matters
In Goodyear’s scorching heat, a weak bond turns into a nightmare fast. Temperature swings can make ordinary adhesives soften, then crack when the night cools.
Choose a product that stays flexible and strong from 110°F down to 50°F. That way the acrylic panels won’t pop off when the desert sun hits.
Top Picks for Goodyear Heat
Here are the three adhesives that survive our climate without drama:
- Polyurethane‑based construction adhesive – Holds up to 200°F, resists moisture, and fills tiny gaps.
- Hybrid MS Polymer sealant – Stays elastic, UV‑stable, and bonds to both acrylic and cement backer.
- Two‑part epoxy with a low‑shrink formula – Best for high‑traffic tubs where you need rock‑solid strength.
Sealant Secrets for a Watertight Edge
Sealant is the final line of defense against leaks. Pick a silicone‑free, acetoxy‑free formula so it won’t yellow under the sun.
Apply a thin bead, smooth it with a wet finger, and let it cure at least 24 hours before the first shower. That simple step saves you from costly water damage later.
Installation Techniques: Cutting, Fitting, and Securing Panels for Seamless Joints
Cutting the Panels Like a Pro
Start with a fine‑toothed carbide blade on a circular saw; it slices cleanly without cracking the acrylic. Measure twice, cut once—mark your cuts with a grease‑pencil and double‑check the dimensions against the wall layout.
Key tools you’ll need:
- Score‑and‑snap cutter for straight edges
- Variable‑speed jigsaw with a fine blade for curves
- Protective gloves and safety glasses
Fitting the Pieces Without Gaps
Lay the cut panels on the floor and dry‑fit them against the wall. Use thin shims at the corners to keep the surface flat and to accommodate any slight wall irregularities common in older Goodyear homes.
Check each joint with a straight edge; any wobble means you need to adjust the shim or trim a millimeter more. A quick “tap test” with a rubber mallet will tell you if the panel sits snugly.
Securing the Panels for a Watertight Finish
Apply a thin, even bead of high‑temperature acrylic adhesive to the back of the panel. Press firmly, then slide a caulking gun along the seam to push the adhesive into the joint.
Finish each seam with a silicone sealant that tolerates desert heat. Smooth it with a wet finger or a silicone tool—this creates a flexible barrier that won’t crack when the temperature swings.
Finishing Touches: Trimming, Edge Detailing, and Waterproofing the Perimeter
Trim It Right
Once the panels are snug, the real magic starts with the trim. A clean cut on the bottom and side rails hides any raw edges and gives the wall that showroom feel.
Grab a fine‑tooth saw or a rotary cutter, then follow these quick steps:
- Measure twice, cut once – mark the exact length before you slice.
- Use a plastic trim kit designed for acrylic; it snaps into place without cracking.
- Secure the trim with a thin bead of silicone, pressing firmly for a seamless seal.
Edge Detailing That Holds Up
Edges are the Achilles’ heel of any bath wall, especially under Goodyear’s desert heat. Choose a profile that matches the panel thickness and offers a built-in drip edge.
Apply the edge piece with a gentle tap, then run a caulking gun along the joint. Smooth it with a wet finger or a silicone tool – the goal is a flat, water‑tight line that won’t crack when the temperature swings.
Waterproof the Perimeter Like a Pro
The final barrier is a waterproof membrane that hugs the floor‑to‑wall interface. In a desert home, moisture can sneak in through tiny gaps, so don’t skimp.
Lay down a self‑adhesive sheet or a liquid waterproofing coat, then seal every seam with a high‑performance acrylic sealant. Finish with a thin ribbon of silicone along the baseboard to keep water where it belongs – inside the tub.
Case Study: Transforming a Goodyear Family Bath with a Custom Acrylic Wall Installation
The Challenge
When the Martinez family moved into their new Goodyear home, the bathroom felt like a relic—cracked tile, uneven grout, and a constant battle with humidity. They wanted a look that screamed modern, but the desert heat made traditional tile a nightmare. Their budget was tight, yet they refused to settle for a half‑done job.
Key pain points:
- Uneven substrate that would reject standard tile.
- High‑temperature fluctuations causing grout to expand and crack.
- Desire for a seamless, low‑maintenance surface.
The Solution
We proposed a full‑height acrylic wall, custom‑cut to fit the 8‑ft by 6‑ft shower space. First, we stripped the old tile, cleaned the cement board, and applied a moisture‑blocking primer designed for desert climates. Then we used a high‑temperature‑resistant adhesive, laying the panels with laser‑precise cuts to eliminate visible seams.
Installation highlights:
- Laser‑cut panels for a perfect fit.
- Silicone sealant formulated for UV exposure.
- Trim pieces in brushed nickel for a polished edge.
The Result
Within a week, the Martinez bathroom looked like a showroom. The acrylic wall stayed cool to the touch, even on scorching afternoons, and required no grout cleaning. The family reported a 30% reduction in cleaning time and praised the instant visual upgrade.
Now, every guest who steps in comments on the “wow factor.” The Martinez home proves that a custom acrylic wall can turn a dated bathroom into a desert‑proof masterpiece without breaking the bank.
Final Words: Recap, Maintenance Tips, and Next Steps for a Flawless Acrylic Bath Wall
Quick Recap
You've measured, primed, and glued—now the wall looks like it belongs in a boutique spa. Key takeaways are simple: prep the surface, match the adhesive to Goodyear’s heat, and seal every joint.
- Accurate measurements prevent costly re‑cuts.
- Use a moisture‑resistant primer to keep the desert humidity at bay.
- Choose a polymer‑based sealant that expands with temperature swings.
Maintenance Tips to Keep It Pristine
Even the toughest acrylic needs a little love. A soft microfiber cloth and a pH‑neutral cleaner are all you need.
- Wipe down after each shower to avoid soap film buildup.
- Inspect seams quarterly; re‑apply sealant if you see any cracks.
- Avoid abrasive pads—scrubbing pads will scratch the surface.
Next Steps
Ready to lock in that showroom shine? Start by scheduling a professional inspection to verify your prep work.
- Contact a local Goodyear installer for a final walkthrough.
- Order any extra edge trim now—it's cheaper than a last‑minute run to the store.
- Bookmark our Acrylic Bath Walls page for future upgrades or warranty info.
People Also Ask
What are the key measurements to take before installing an acrylic bath wall in Goodyear?
Measure the length, height, and width of the bathtub area, including any protruding fixtures. Add a 1‑2 inch allowance for expansion and trimming to ensure a precise fit.How does Goodyear’s desert climate affect the choice of adhesive for acrylic panels?
High temperatures and low humidity can cause adhesives to cure faster, so a heat‑resistant, moisture‑tolerant polymer adhesive is recommended. Look for products labeled for “extreme temperature” or “desert conditions.”Do I need to prime the wall surface before applying acrylic panels?
Yes, priming creates a stable, moisture‑resistant base that improves adhesion and prevents delamination. Use a primer specifically formulated for cement backer board or drywall in wet areas.Can I install acrylic bath walls myself, or should I hire a professional?
While DIY installation is possible for experienced handymen, professional installers ensure seamless joints, proper sealing, and compliance with local building codes. Hiring experts reduces the risk of costly mistakes and warranty issues.What maintenance steps keep an acrylic bath wall looking new in a desert environment?
Clean the surface regularly with a non‑abrasive cleanser and a soft cloth to avoid scratches. Inspect seals annually for cracks and reapply a silicone sealant if needed to maintain waterproof integrity.Goodyear Bathroom Remodel brings over a decade of specialized bathroom renovation expertise to homeowners throughout Goodyear, Arizona. Their team combines skilled craftsmanship with a deep understanding of local design trends and building codes, ensuring each project meets the community’s standards for quality and functionality.
Need Bathroom Remodel?
We transform your bathroom into a modern, functional space in just weeks. Serving Goodyear (85338, 85395) and nearby areas (85323, 85340, 85353).
Get Remodel Estimate