Picture this: you’ve just splashed the final tile, the water’s running, and a nasty drip starts creeping down the wall like it owns the place. One slip‑up with the shower liner and you’re looking at a repair bill that could fund a new kitchen.
Most homeowners think a cheap liner will do the trick, but the truth is, a low‑grade product or a botched install turns a simple shower into a water‑damage nightmare. The wrong seams, missed corners, or a liner that can’t handle Goodyear’s heat swings will betray you fast.
In this desert climate, the liner isn’t just a barrier—it’s the unsung hero that protects your drywall, your flooring, and your peace of mind. Skipping the proper prep, ignoring the manufacturer’s instructions, or trying to save a few bucks on labor can cost you thousands down the road.
Ready to learn the exact steps that keep water where it belongs and your wallet intact? Keep reading and we’ll walk you through the must‑know fixes before you even pick up a tool.
Understanding Shower Liner Types and Their Suitability for Goodyear’s Climate
Goodyear’s desert heat can swing from 110°F in July to a chilly 40°F at night. That kind of temperature roller‑coaster makes a flexible liner a must, otherwise the material will contract, crack, and let water slip behind the tiles. Choose a liner that can breathe with the house, not one that will buckle the first time the thermostat spikes.
What’s on the market?
- PVC (Polyvinyl Chloride) – cheap, easy to cut, but can become brittle when exposed to UV‑rich sunlight through a glass door.
- CPE (Chlorinated Polyethylene) – tougher than PVC, resists chemicals, and holds up better under Goodyear’s heat cycles.
- Composite (PVC + CPE blend) – offers the best of both worlds: flexibility for tight corners and durability for long‑term performance.
When you’re weighing options, think about the installation method you’ll use. A pre‑formed sheet works great for a simple remodel, while a liquid‑applied membrane can seal every nook in a custom shower. The right choice saves you from a costly redo down the line.
Key factors to match liner to climate
- Thermal expansion rating – look for a product that lists a wide temperature range.
- UV resistance – especially important if your shower has a skylight or large glass panel.
- Warranty length – a longer warranty usually means the manufacturer trusts the liner in harsh conditions.
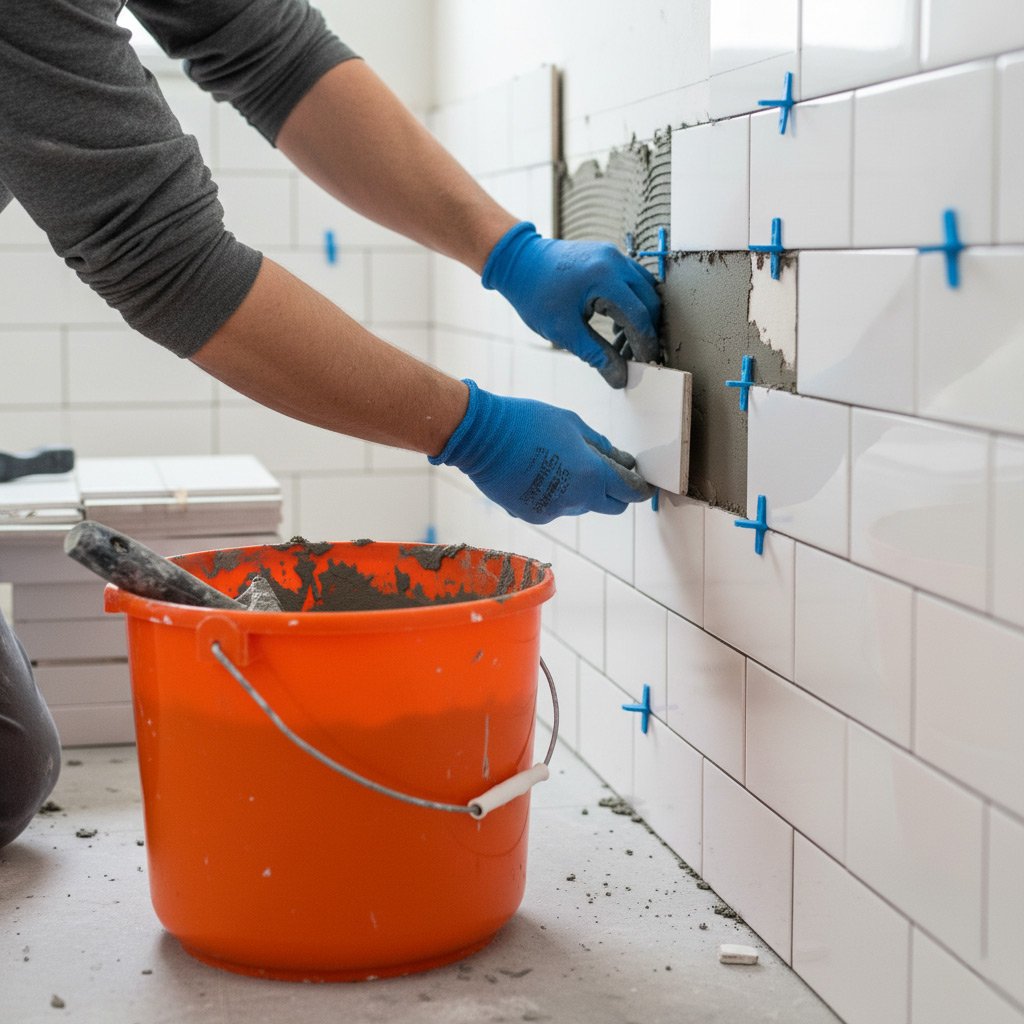
Proper Surface Preparation: Essential Steps Before Liner Installation
Clear the Deck
Start by stripping away any leftover caulk, grout haze, or adhesive residue. Scrape, sand, and vacuum until the surface feels smooth to the touch. A clean canvas stops the liner from bonding to debris and prevents future leaks.
Dry the Substrate
Moisture is the enemy. Use a moisture meter or simply press a dry towel against the wall; if it stays damp after 24 hours, wait.
In Goodyear’s desert heat, the walls can sweat at night. Run a dehumidifier or fan for at least 48 hours to bring the humidity below 50 % before you lay anything down.
Patch, Level, and Prime
Inspect every corner for cracks or gaps. Fill them with a hydro‑resistive patching compound, then sand smooth.
Once the patches cure, apply a thin coat of primer designed for shower walls. This creates a uniform surface that the liner will cling to without bubbling.
- Tools you’ll need: utility knife, sanding block, moisture meter, fan/dehumidifier, patching compound, primer brush.
- Tip: Work from top to bottom so you don’t step on freshly primed areas.

Step‑by‑Step Installation Guide: Cutting, Fitting, and Sealing the Liner Correctly
Getting the liner right starts before you even touch a knife. Measure twice, cut once, and keep the bathroom’s heat swings in mind. A precise cut saves you from costly gaps later.
Cutting the Liner
Grab a sharp utility knife and a straight edge. Lay the liner flat on a clean surface, then:
- Mark the shower curb, tub edge, and any niches with a pencil.
- Cut a 2‑inch overhang on each side; this gives you room to tuck and seal.
- Trim corners at a 45‑degree angle to avoid sharp points that can tear.
After the cuts, lay the piece back on the floor. It should sit flush without stretching. If it bows, trim a little more – better to be snug than strained.
Fitting the Liner
Slide the liner into place before any adhesive hits the wall. Press it gently against the tub and curb, making sure the overhangs follow the contours.
- Use a plastic scraper to smooth out bubbles.
- Check that the liner reaches the top of the wall by at least an inch.
- Secure the edges with temporary painter’s tape; this holds it while you work on the seams.
When the liner sits right, you’ll notice a clean line where the wall meets the tub. That’s the sweet spot for a watertight seal.
Sealing the Liner
Now comes the glue. Choose a 100% silicone sealant rated for high‑temperature environments – Goodyear summers can push 115°F.
- Apply a continuous bead along every seam and the perimeter.
- Smooth the bead with a wet finger or a sealant tool; aim for a uniform, concave shape.
- Let it cure 24 hours before tiling or exposing it to water.
Once the sealant is set, remove the painter’s tape and give the liner a final visual check. No gaps, no wrinkles, just a solid barrier ready for tile work.
Common Installation Mistakes and How to Avoid Them
1. Skipping the Primer or Backer Board Check
Many DIYers assume the wall is ready as‑is. In Goodyear’s heat, a porous backer will let moisture seep behind the liner.
Fix: Apply a cement‑based primer or install a waterproof backer board before the liner goes down.
2. Cutting the Liner Too Tight
It’s tempting to trim every excess inch. A tight fit creates stress points that tear when the shower expands.
Leave a ½‑inch wiggle room around corners and seams. Use a utility knife, not scissors, for clean cuts.
3. Ignoring the Manufacturer’s Seam Tape
Some installers replace the supplied tape with generic silicone. The result? Leaks at the joints.
Stick to the brand‑specific tape, press it firmly, and roll a roller over the seam to seal it.
- Don’t reuse old tape – it loses adhesion.
- Apply tape in a well‑ventilated area to avoid bubbles.
- Check the tape’s expiration date; old tape can fail fast.
4. Forgetting to Seal the Drain Flange
The drain is the weakest link if not sealed properly. Water can travel under the liner and ruin the subfloor.
Wrap the flange with butyl tape, then run a bead of silicone around it before the liner sits on top.
By catching these slip‑ups early, you keep the liner doing its job and avoid a $8,000 repair later.

DIY vs. Professional Installation: Weighing Costs, Risks, and Benefits
Going solo can feel like a power move, especially when the price tag on a contractor looks like a small mortgage. But in Goodyear’s scorching heat swings, a cheap mistake can turn your bathroom into a swamp faster than you can say “leak.”
Why Some Homeowners Choose DIY
- Up‑front savings – No labor bill means you keep cash in your pocket.
- Control over timing – You set the schedule, not a busy contractor.
- Learning a new skill can be oddly satisfying.
That sounds great until the liner peels, the seams split, or the adhesive fails under desert heat. Fixing those errors often costs more than the original labor, plus you waste time re‑doing work you thought you’d saved on.
The Professional Edge
- Experienced hands know how to prep the substrate for Goodyear’s humidity spikes.
- They use manufacturer‑approved adhesives that stay flexible when temperatures swing.
- Warranty coverage – most pros back their work, protecting you from future headaches.
Hiring a pro isn’t just about muscle; it’s about insurance. A licensed installer can spot hidden issues—like a warped backer board—that a DIYer would miss, saving you from an $8,000 repair down the line.
Case Study: A Mis‑installed Liner That Cost $8,000 in Repairs—and the Solution That Saved the Homeowner
What Went Wrong
When the Martinez family renovated their Goodyear bathroom, they chose a budget‑grade liner and tried to cut corners on the install. The result? A seam that wasn’t fully overlapped, a few inches of tile left exposed, and a liner that warped under the desert heat.
The water seeped behind the tile, rotted the drywall, and ruined the subfloor. Within weeks, the house was dealing with mold, a sagging shower pan, and an $8,000 repair bill that could have been avoided.
- Improper seam overlap: only 1‑inch overlap instead of the recommended 2‑inches.
- Missing backer board: the liner was glued directly to old drywall.
- Wrong adhesive: a cheap silicone that broke down in high temperatures.
The Turnaround
We stepped in, stripped the damaged area, and installed a premium 30‑mil PVC liner designed for Goodyear’s temperature swings. First, we added a cement board backer, then we used a high‑temperature‑rated adhesive and sealed every joint with a reinforced tape.
After the new liner cured, we re‑tiled with a waterproof membrane underneath. The result? No more leaks, no more mold, and the Martinez family saved more than $5,000 compared to a full‑scale rebuild.
Final Words
Even after you’ve nailed the liner, the job isn’t over. A quick visual check every six months can catch a tiny lift or a hairline crack before it becomes a flood. Spot the problem early and you’ll save yourself a weekend of demolition.
Quick Checklist
- Look for bubbles or loose edges where the liner meets the wall.
- Run a fingertip along seams; any roughness could mean a seal failed.
- Check the grout lines for cracks – water loves a tiny opening.
If anything feels off, don’t gamble on a DIY patch. A professional knows the exact sealant mix and the right pressure to apply, especially in Goodyear’s heat‑cycle. Call a trusted installer before the water finds a way out.
Need more guidance or a second opinion? Browse our Shower Liners page for expert tips, product reviews, and a list of vetted contractors ready to keep your bathroom dry.
People Also Ask
What type of shower liner works best for Goodyear’s hot, dry climate?
A PVC or CPE liner with UV‑resistant additives is ideal because it tolerates high temperatures and resists cracking from dry air. These materials also handle occasional water‑spot stains common in desert environments.How should I prepare the shower base before installing a liner?
Clean the surface thoroughly, remove any old caulk, and ensure the base is level and free of debris. Apply a primer or waterproofing membrane if recommended by the liner manufacturer.What are the most common mistakes that cause leaks after installing a shower liner?
Improperly trimmed corners, insufficient overlap at seams, and using the wrong type of sealant are the top culprits. Skipping the final caulk bead around the tub edge also leads to water infiltration.Is DIY installation of a shower liner worth the risk?
DIY can save money, but a single error—like a mis‑cut or missed seal—can cost thousands in repairs. Hiring a licensed professional ensures the liner is installed to code and backed by a warranty.How can I tell if a shower liner was installed incorrectly before water damage occurs?
Look for gaps, uneven seams, or visible bulges in the liner after the shower is dry. Conduct a water test by flooding the tub and checking for moisture behind the walls or on the floor within 24 hours.Goodyear Bathroom Remodel brings over a decade of specialized bathroom renovation expertise to homeowners throughout Goodyear, Arizona. Their team combines skilled craftsmanship with a deep understanding of local design trends to deliver functional, stylish spaces. Committed to personalized service, they guide each project from concept to completion with clear communication and reliable timelines.
Need Bathroom Remodel?
We transform your bathroom into a modern, functional space in just weeks. Serving Goodyear (85338, 85395) and nearby areas (85323, 85340, 85353).
Get Remodel Estimate